Division of Computing and Information Systems
Division of Computing |and Information Systems
  • Services
    • Backup and Restore
      • Backup Policy
      • Joining and Installation
      • Restoring data from backup
      • Mailbox Backup
    • Cloud Computing Services
      • Office 365
        • SharePoint Online
        • Central email at the Technion – Cloud services Office 365
      • Microsoft Azure Service
      • Video Conference service using Zoom software
    • Communication Services
    • High Performance Computing (HPC)
      • HPC Services
        • Zeus CPU Cluster
        • Zeus DGX Cluster
      • HPC Resources
        • CPUs (Zeus) – Utilization Graphs
        • GPUs (Zeus) – Utilization Graphs
        • Active Table
      • HPC Documentation
        • Work procedure
        • Accounts
      • HPC Support
      • HPC Rates & Billing
      • HPC Software
        • Zeus Cluster Supported Software
      • IUCC HPC Cloud
    • Monitoring
    • Servers
      • Account Opening Guide for a computer account at the Technion
      • Authentication Services in Central Servers
      • Hosting physical servers
      • Hosting virtual servers
      • Virtualization
        • Server virtualization
        • Azure Virtual Desktop service for students
    • Software
      • Software Catalogue
      • Software Acquisition
      • Microsoft Software Licensing
    • Storage Solutions
      • Central storage
      • OneDrive Cloud Storage
    • Technion Email
      • Central email at the Technion – Cloud services Office 365
      • Mailing Lists
      • FAQ’s
    • SECTIGO Certificate System
  • Support
    • FAQ-Frequently Asked Questions
    • ESS/MSS System – Self-Service for Employees and Managers
    • Training Aids – Miscal Project
    • TeamViewer Installation
    • Remote Desktop Connection
    • Faculty Engineers
    • Macintosh Support
    • Antivirus
  • Information Security
    • User Information
    • Security alerts
    • Safe Surfing
    • Privacy in social networks
    • Password management guide
    • Password Management
    • File Encryption Guide
    • Tips for using Zoom
    • Avoid and report phishing emails
  • About
    • Directions to CIS
    • Contact Us
    • MyCIS
    • People
  • ע
Division of Computing and Information Systems > VOIP phone management (phone, contacts, and call forwarding settings)
VOIP phone management (phone, contacts, and call forwarding settings)

    VOIP phone management (phone, contacts, and call forwarding settings)

    Login to the phone portal – Self-Care

    *The telephone portal can only be accessed through the Technion network.*

    Step 1 click on this link.

    Step 2 enter username and password (computer login user – not full email!).

    Step 3 click on sign in.

    My Phones

    The My Phones window displays the phones belonging to the user with whom you have logged into Self-Care and to which you can make changes.

    For example: speed dial numbers, contact lists, follow me, catch and unanswered leads (internal/external calls).

    Set up speed dial numbers

    To set up speed dial numbers, perform the following procedure:

    Procedure:

    Step 1: Click the Phones tab.

    Step 2: Click the phone settings.

    Step 3: Click Short Dial Numbers.

    Step 4: Do the following:

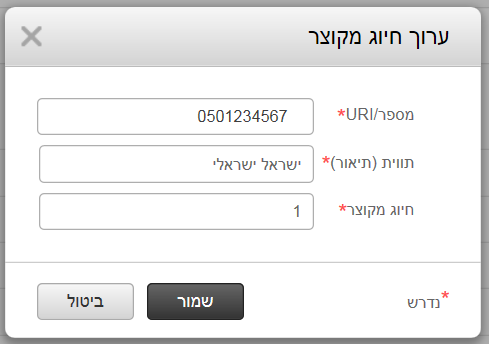
    • Click Add a new speed dial number.

    Step 5 In the Number field, enter the contact’s phone number.

    Company phones.

    Step 6 In the Label text box, enter a description for your speed dial number. Your phone will use the description to display the speed dial number.

    Step 7 In the ‘Short Dial’ text box, assign a speed dial number. (Example: 1, 2, etc.)

    Step 8 click save.

    Set up your phone’s contact members

    Phone contacts allow you to save phone numbers and email addresses of the contacts on your phone. You can check the contact list on your phones.

    To set up your phone’s contact list, perform the following procedure:

    Each user has one contact list for all their phones.

    phone’s contact members.

    Procedure:

    Step 1: Click the Phones tab

    Step 2: In the left navigation pane, click Phone Settings and then Phone Contacts.

    Step 3: Click the Create New Contact. The Add a New Contact to Your Phone window will appear

    Step 4: Enter the contact information in the fields.

    Step 5: Click save

    Call forwarding options


    With the Self-Care phone portal, you can forward your incoming calls to internal/external destinations (depending on permissions).

    Set up the forwarding of all calls / calls in catch and unanswered

    To set your phone to forward incoming calls to another number, perform the following procedure:

    • Procedure for forwarding all calls:

    Step 1: Click the Phones tab.

    Step 2: In the left navigation pane, click Call Forwarding.

    Step 3: Fill in the field with the phone number you want to forward your calls to, and click the checkbox

    Step 4: Save.

    • The procedure for transferring all calls in catch and unanswered:

    Step 1: Click the Phones tab.

    Step 2: In the left navigation pane, click Call Forwarding.

    Step 3: Click Advanced Connection Rules.

    Step 4: Use the drop-down list boxes to set call forwarding options for internal and external calls Fill in the required fields and click the check box

    Step 5: Click Save.

    Common symbols

    © All rights reserved to Division of Computing and Information Systems
    • Accessibility Statement (heb)
    • Phone Directory
    • Site Map
    Font Resize
    Accessibility by WAH